Requirement:
- Domain name that is used in the Common Name (CN) has been registered and publicly accessible.
- The email service for that domain is available and you have full control to create temporary email account if required.
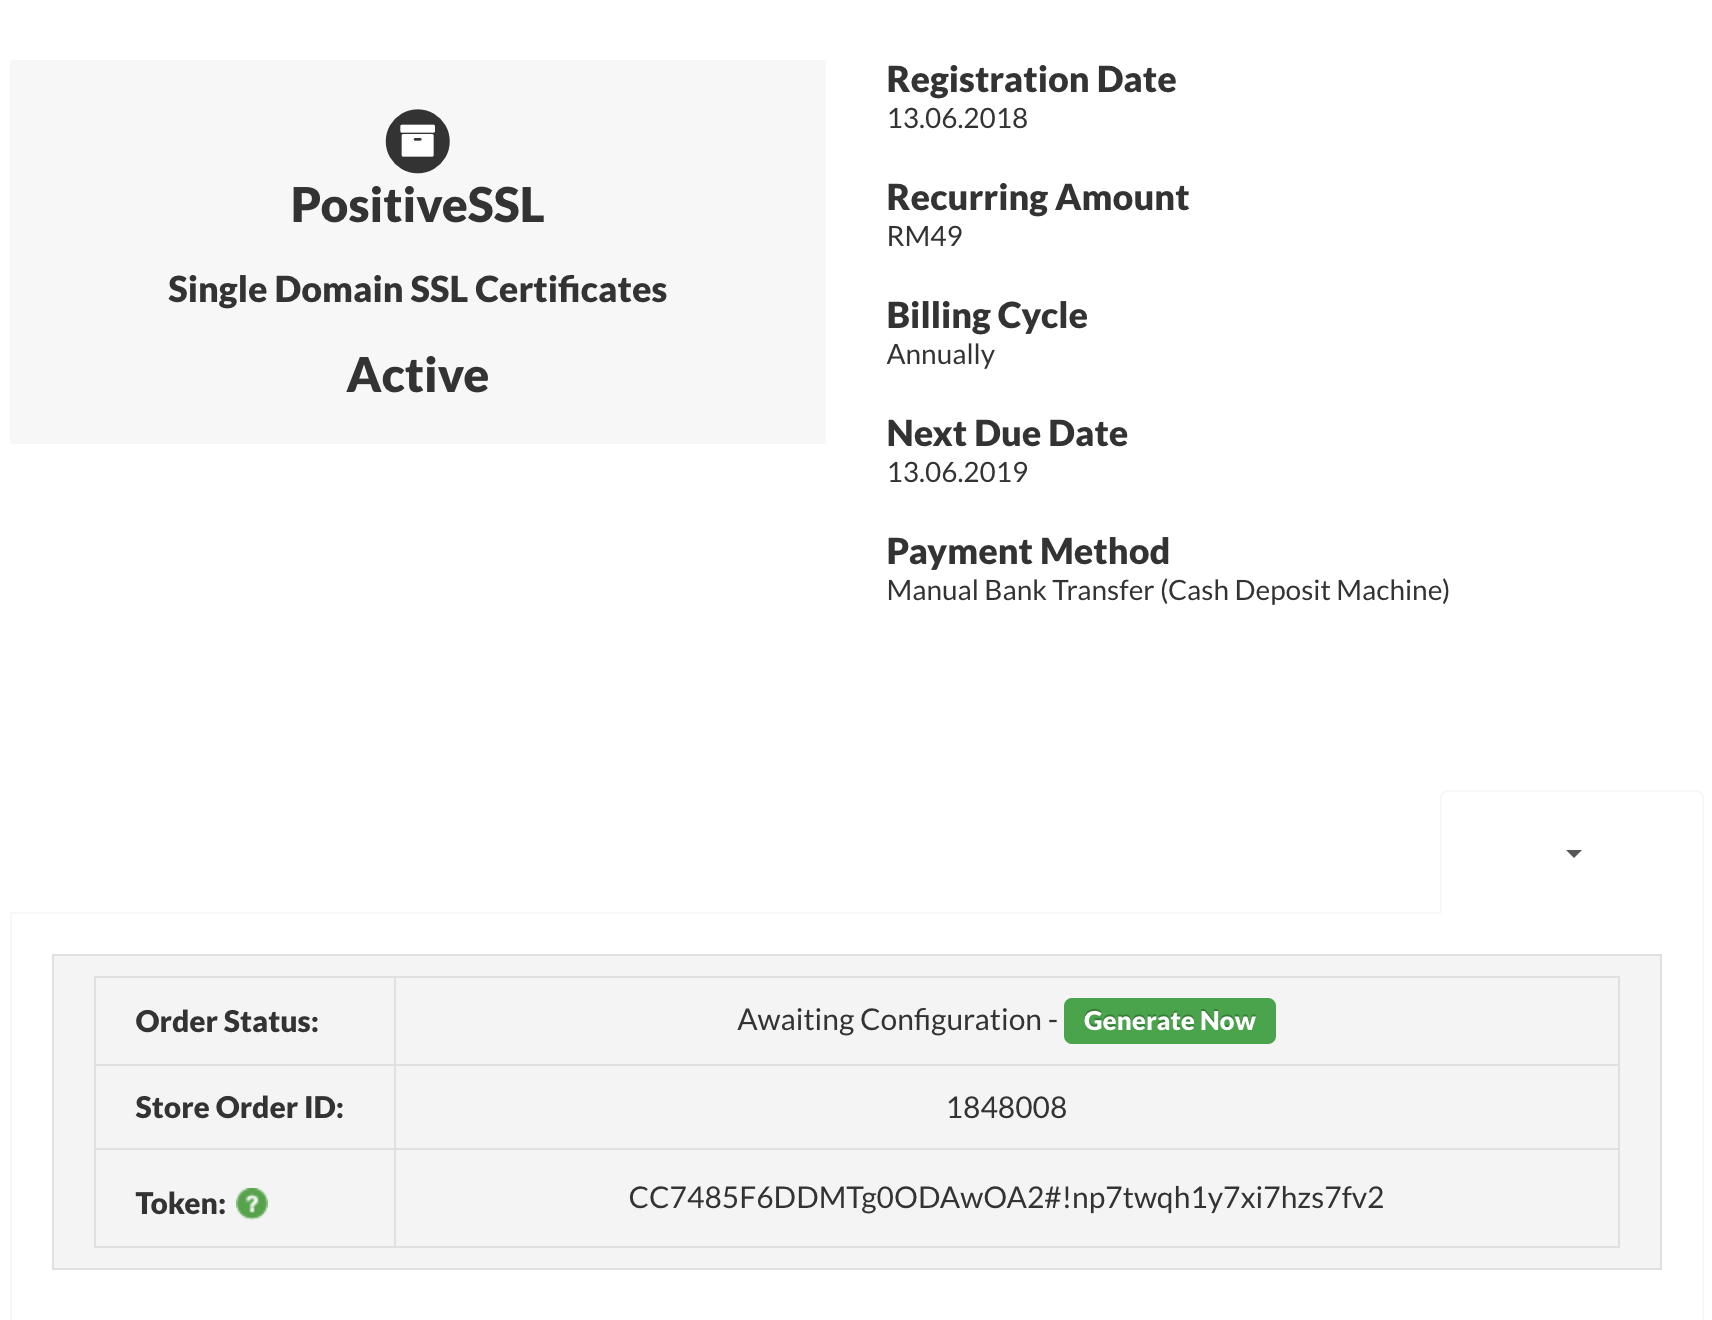
1. Login to your Client Area account and go to Services > My Services. Here you need to select the services which relates to your SSL certificate that you had ordered and click Manage Product.
2. You will see that your ordered SSL certificate has not been fully configured yet and you are seeing a green button stating Generate Now.
3. To proceed with the SSL submission process, you will need to click on the green button. The system will open a new window which allows you to fill in the CSR details.
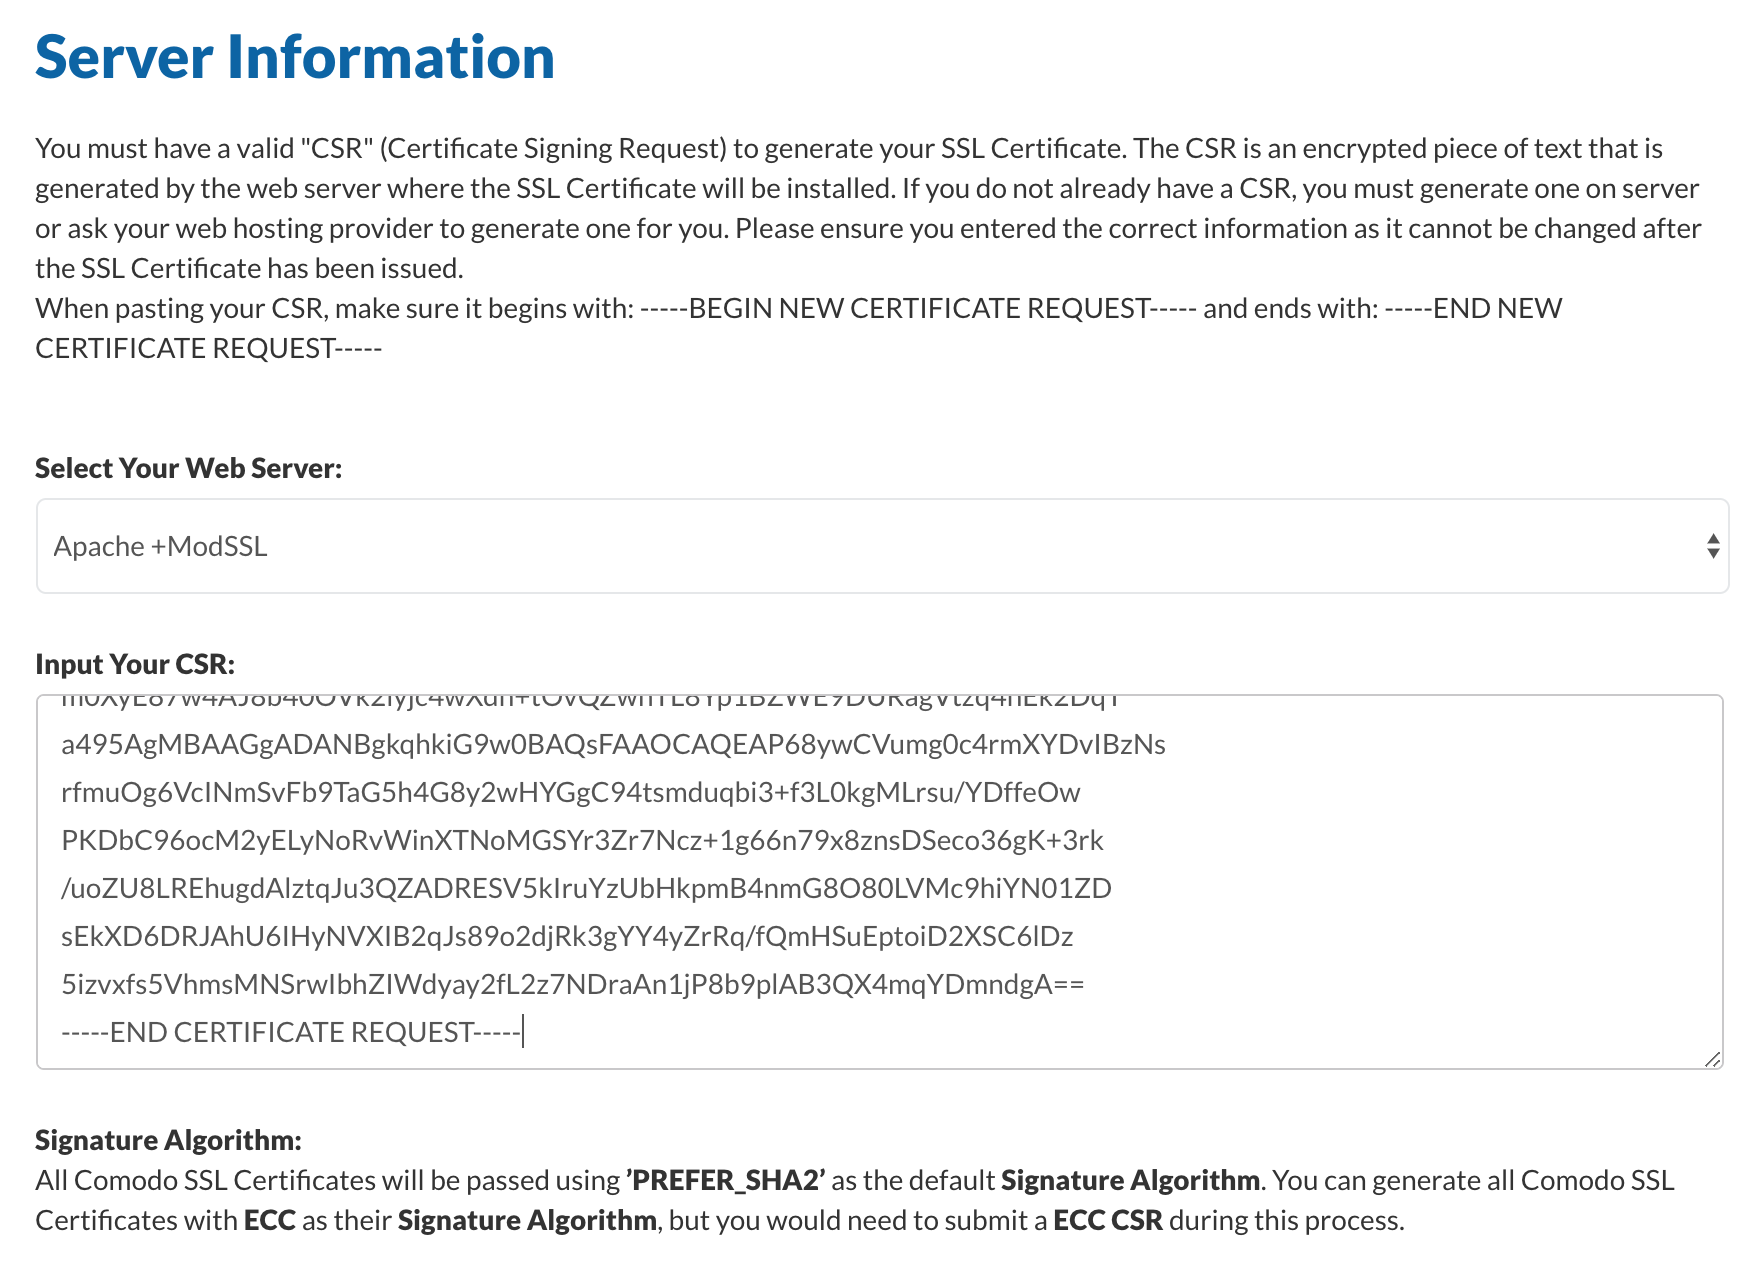
Remember to choose the correct type of web server that you will use to host the SSL certificate. The most common web server is Apache for linux and IIS for Windows. You will need to copy the content of your CSR file and paste it is the second put box. Remember to copy all the content.
4. Please proceed to key in all the required information for your SSL certificate submission especially Admin and Technical details. Once you have complete the forms, click Continue to the next step.
5. Now you will need to choose how you would like to proceed with your domain validation. The most common validation process is being done through email. However, there are also few other steps that you can choose. However, these flexibility are totally depends on the Certificate Authority which provide your SSL certificates.
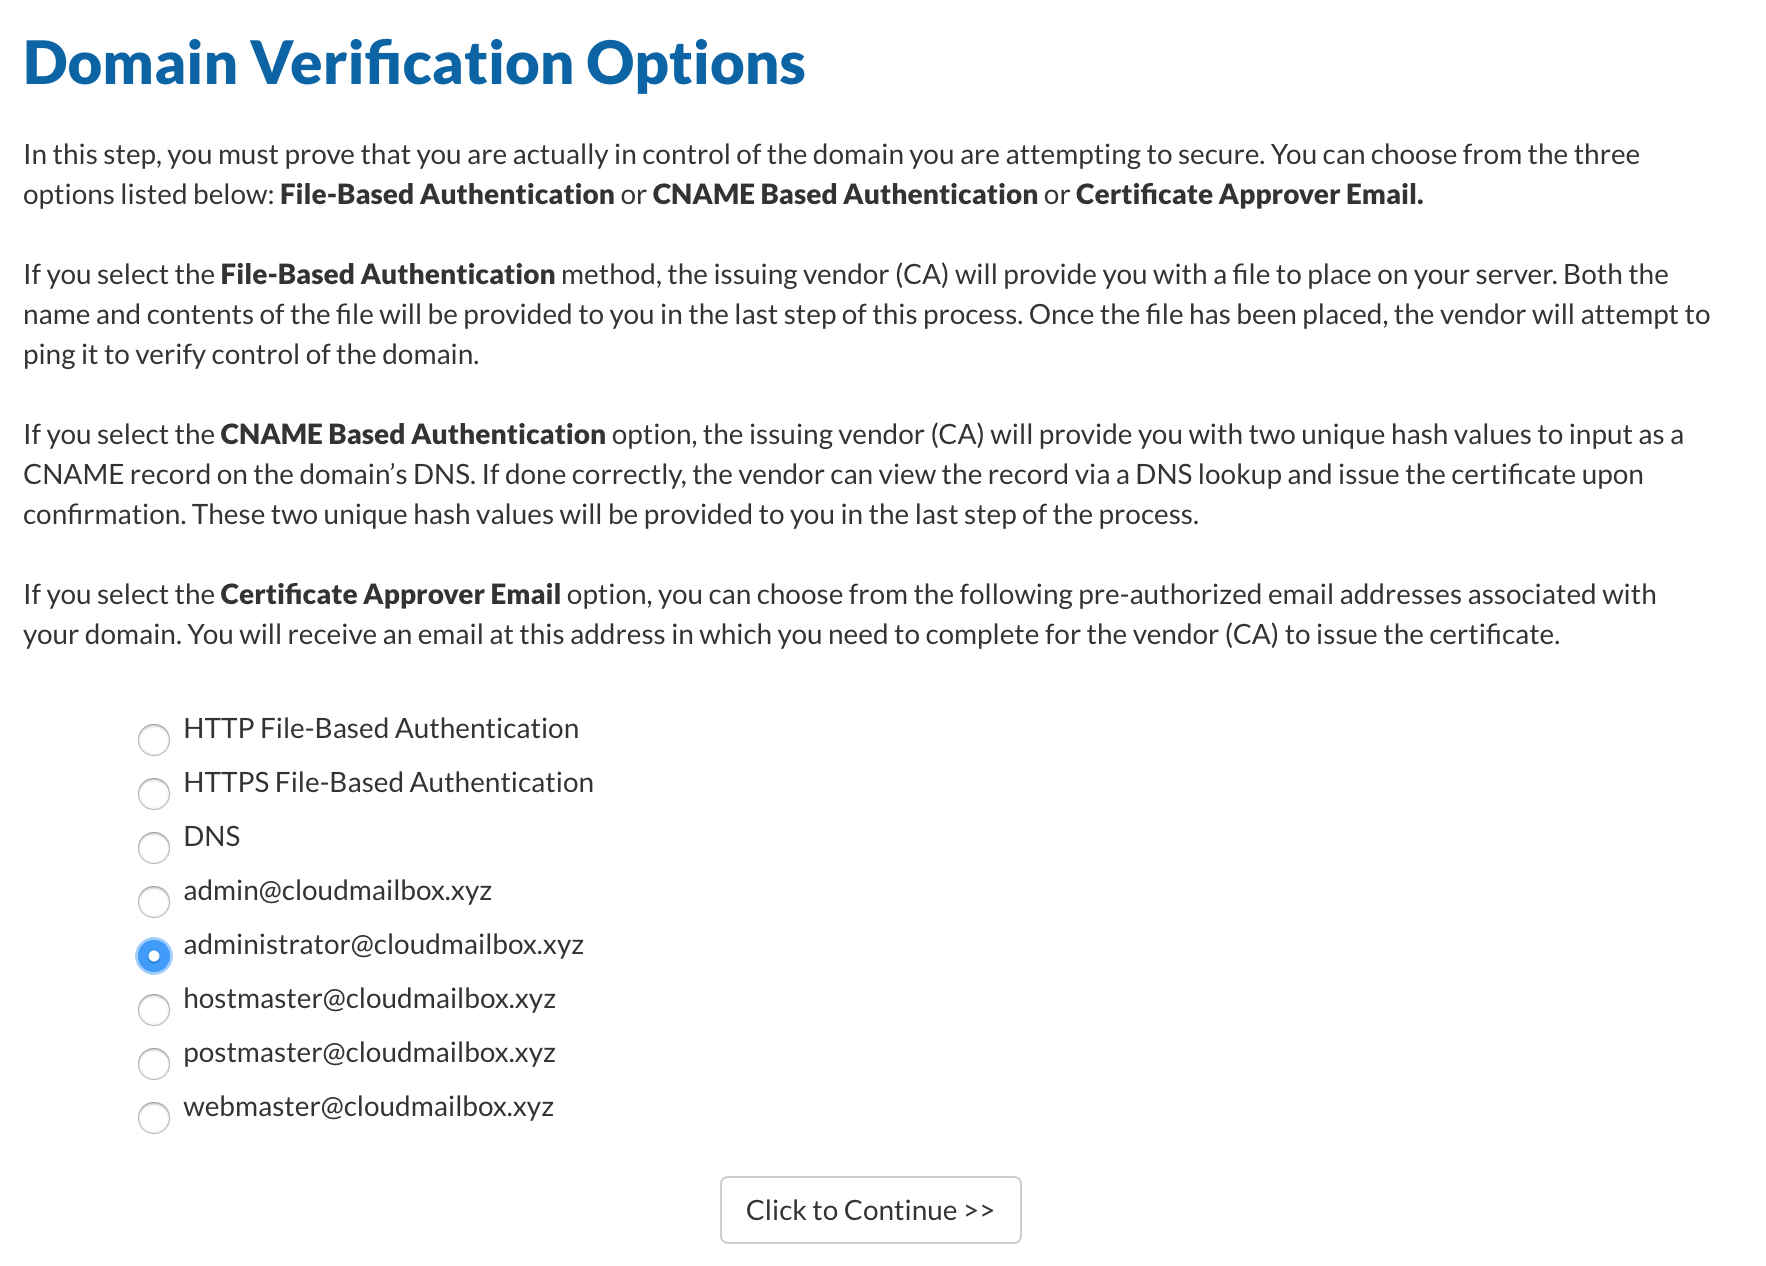
As for this KB, we are using comodo as the Certificate Authority. You will have option to use HTTP/S file based authentication, DNS which is using cname and also email service. We have choose to use email where the validation hash/password will be send to administrator@cloudmailbox.xyz. Now click continue, You will now see that your submission is complete.
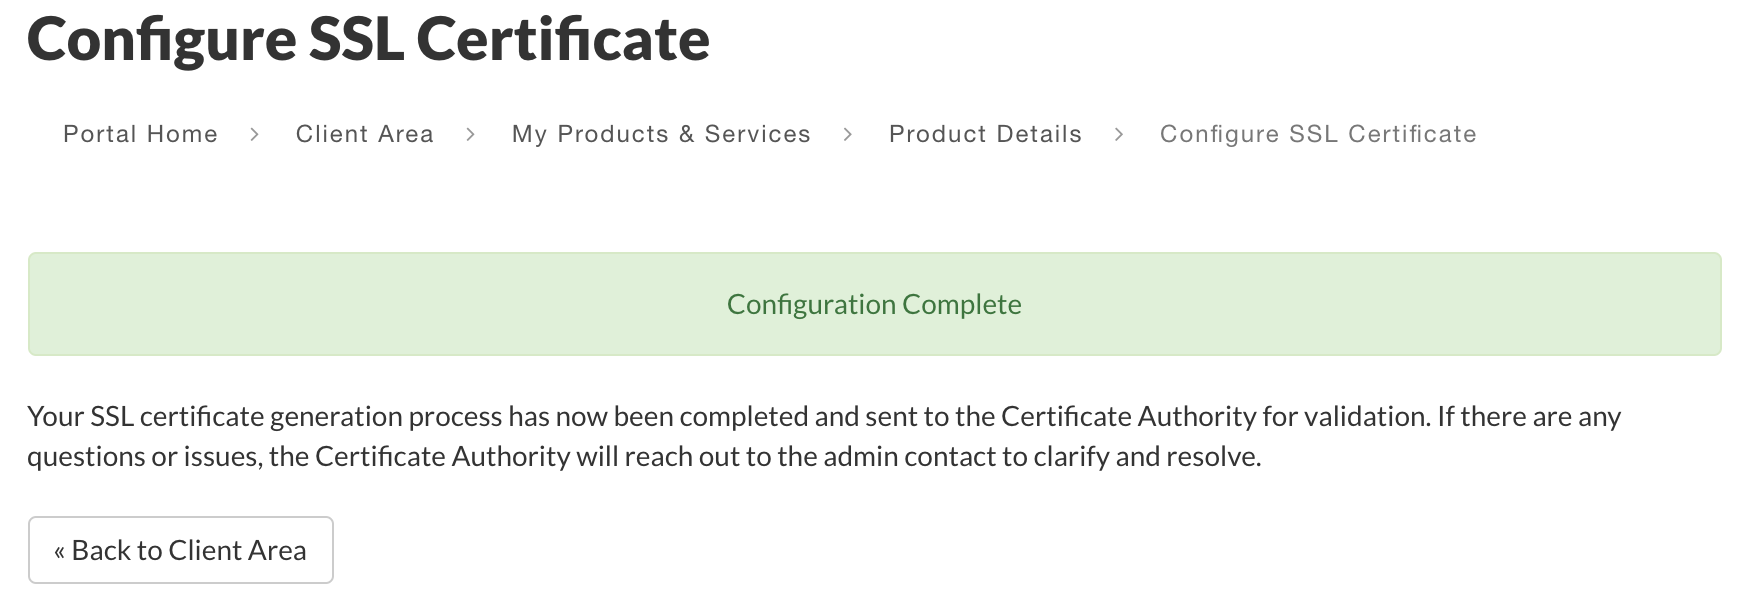
6. Now you can go back to your service list and select your SSL certificate. You will now be able to see your SSL certificate status whcih should be showing Pending.
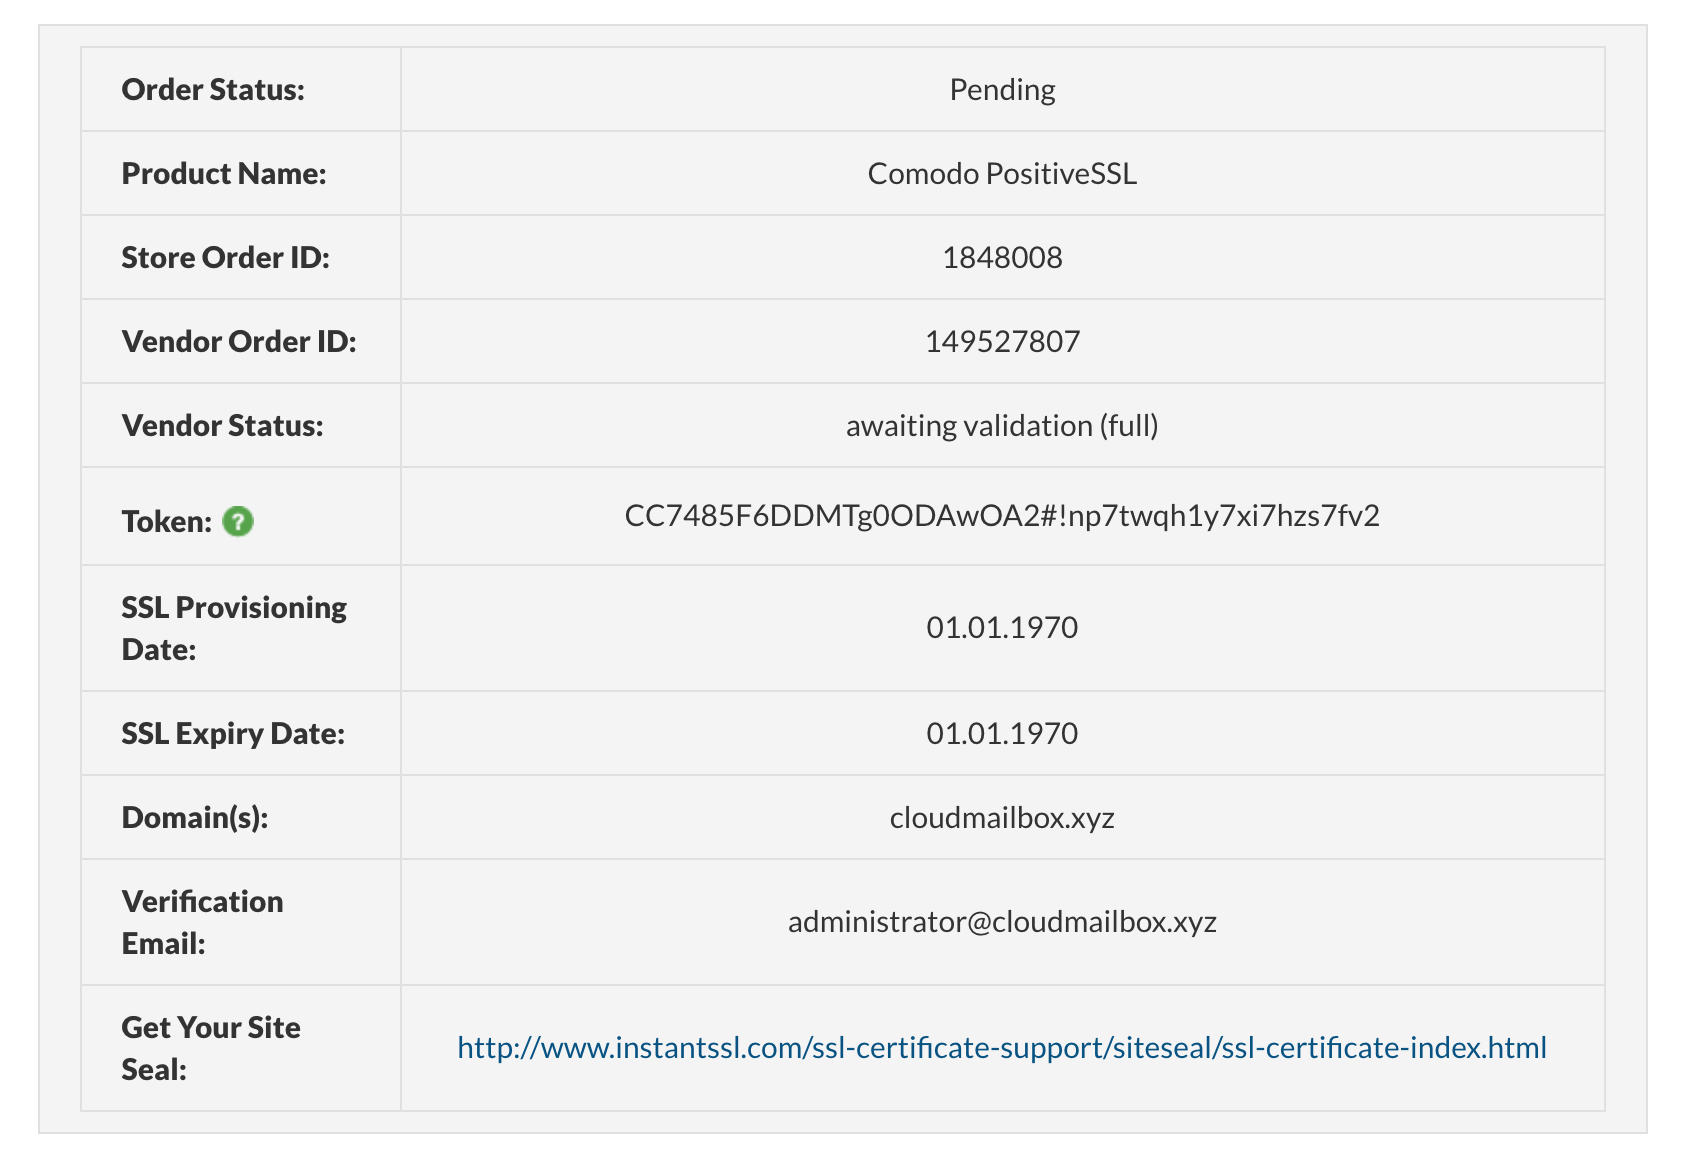
This status means that you have not completed the Domain Validation process yet. You will need to check your approver email account for Approval email from your Certificate Authority.
7. Login to your Approver email and check for Approval emails from your certificate authority.
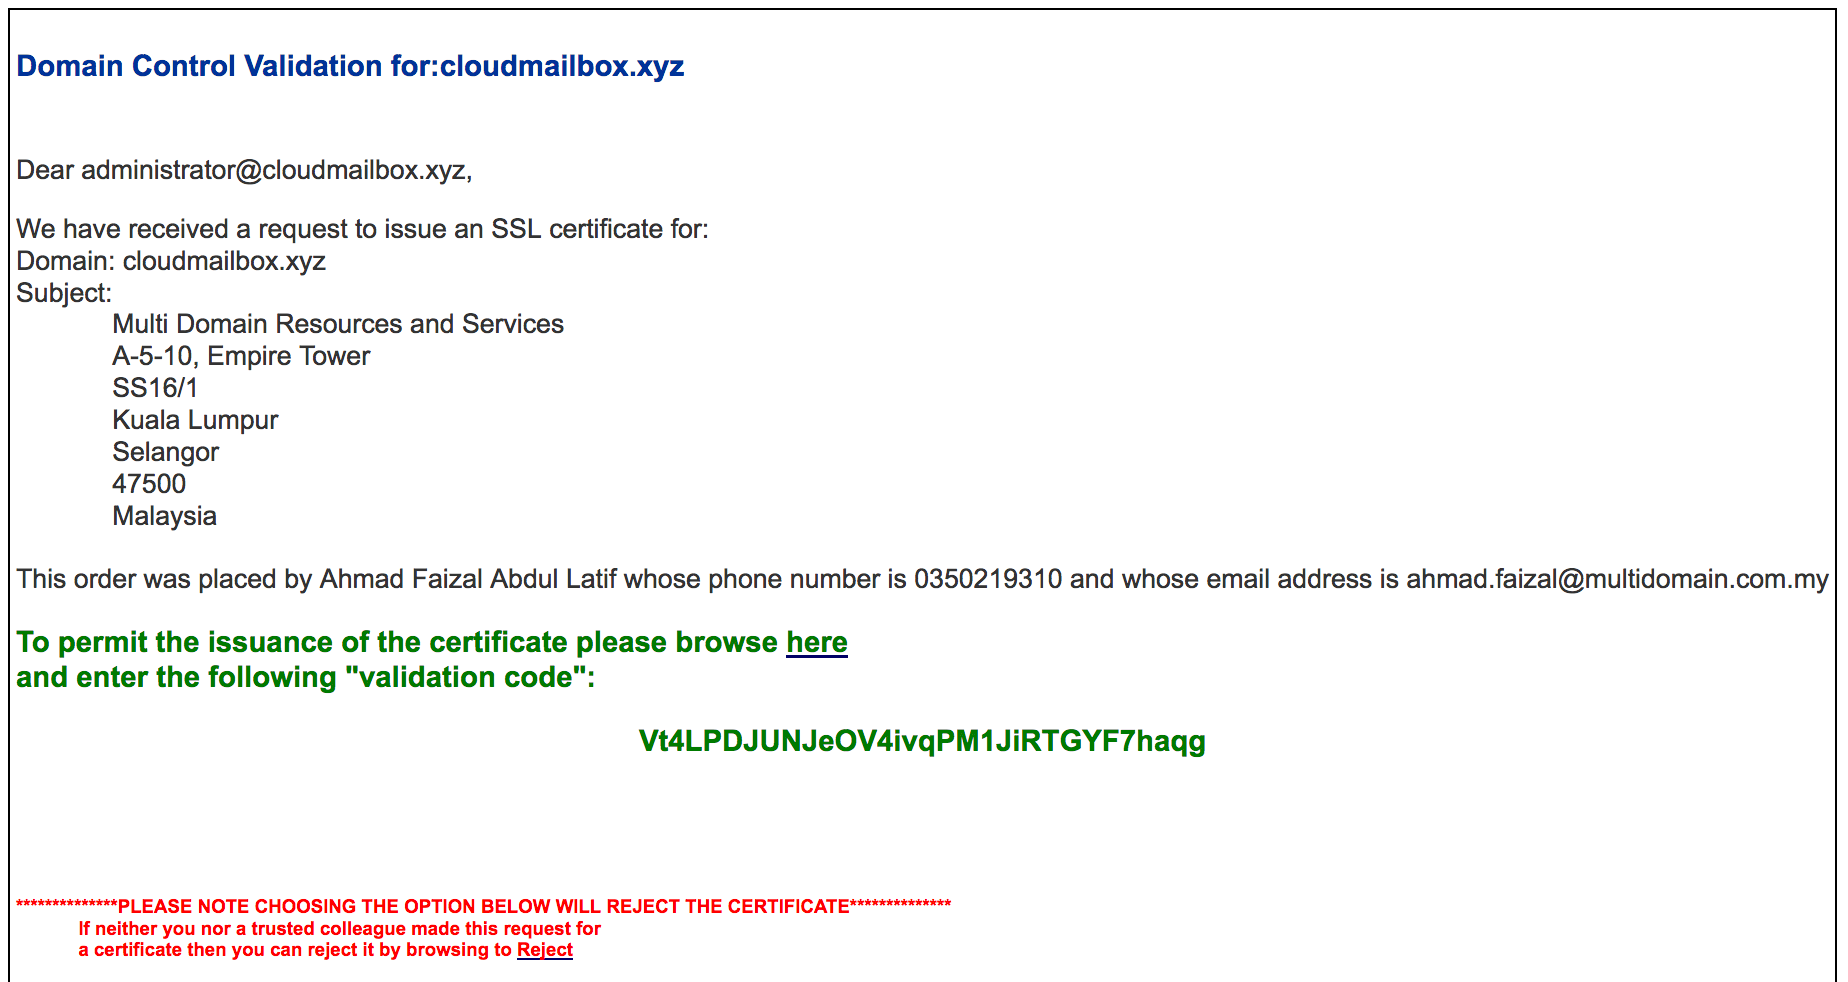
Above image is sample Domain validation email sent to your approver email.
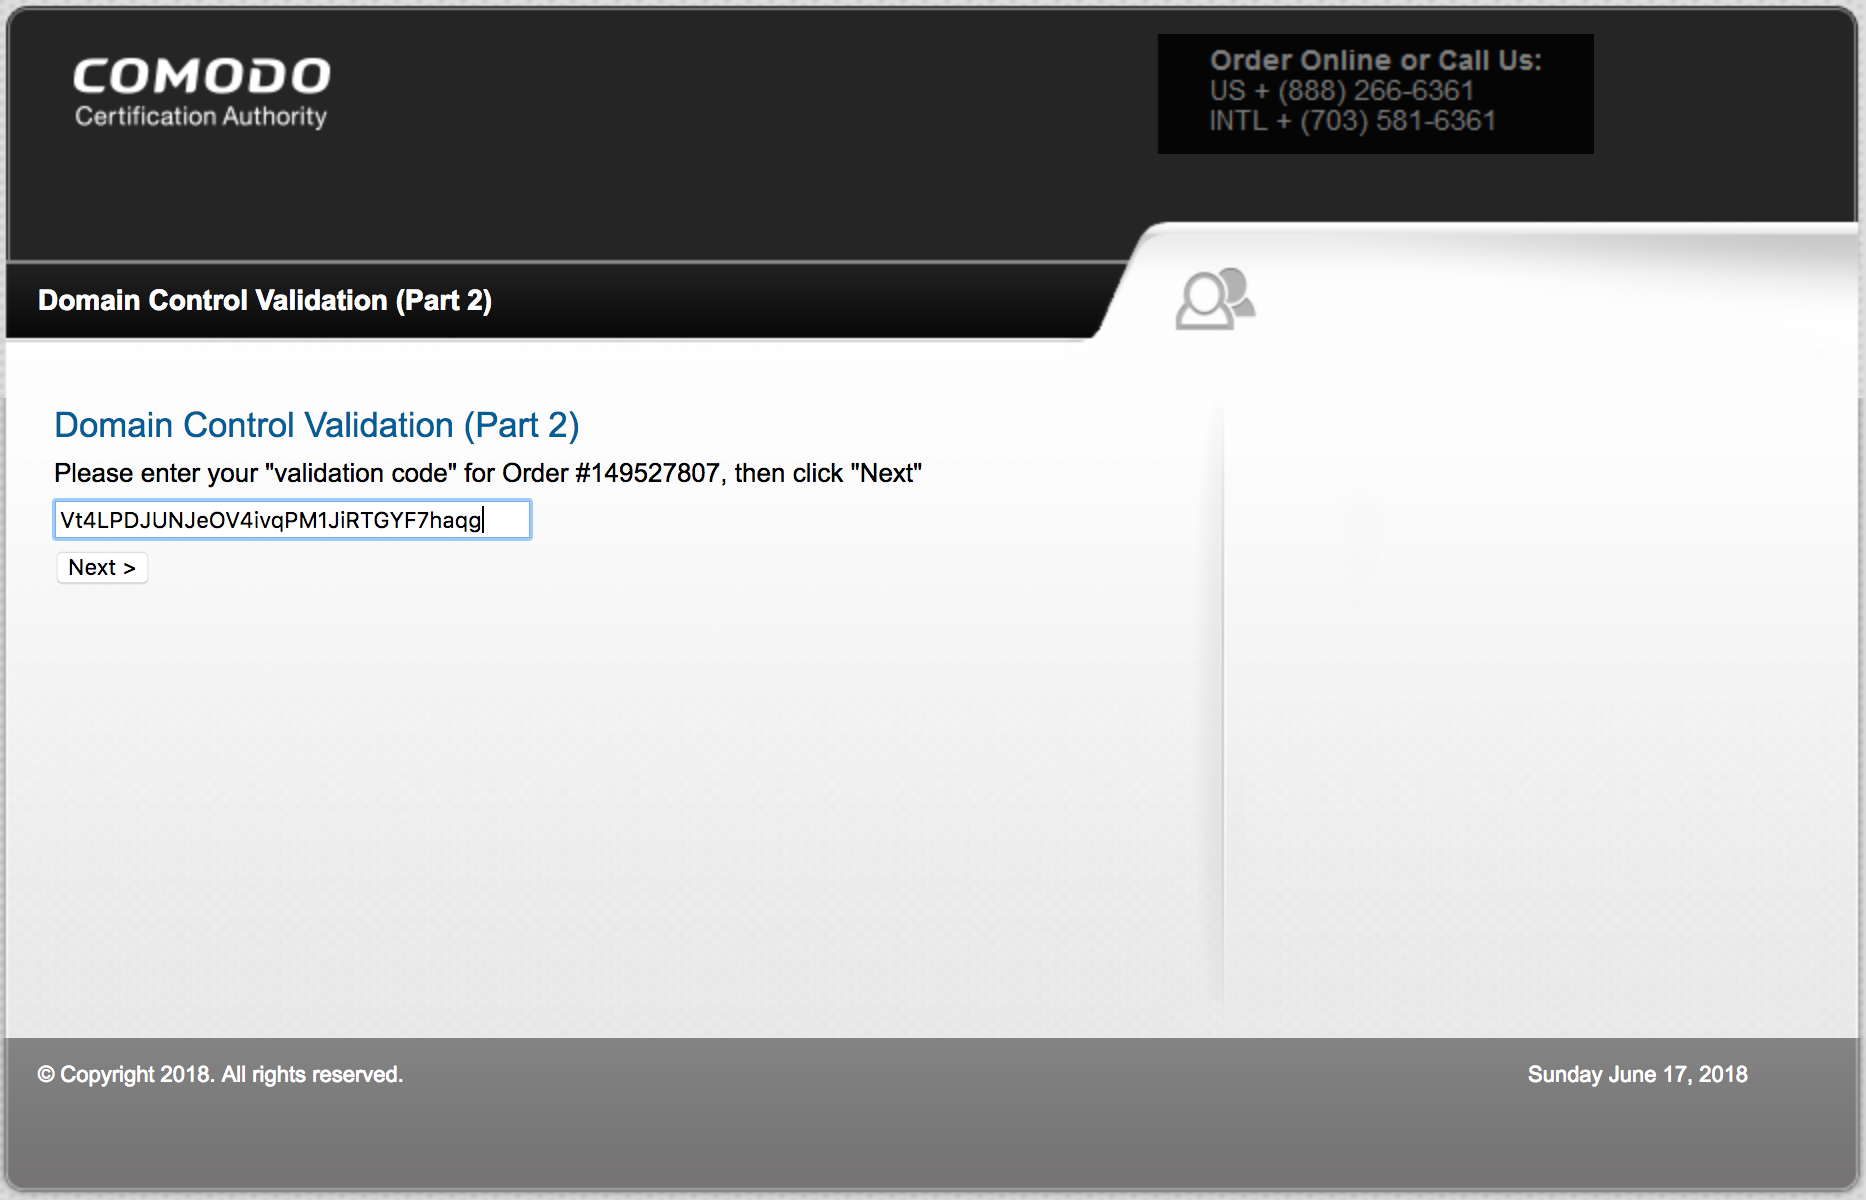
8. Click on the validation link and a new window will be open. Copy the hash/password inside the email and paste it on the validation window. Click Next to proceed.
9. Once the above process complete, give at least 5 minutes for the system to syncronize with Certificate Authority on your SSL certificate status.

Once you get your Status is Active, you will be able to download your SSL certificate from your Client Area account.
